Support
Discover how to use Report Rover™. From page functionality to adding your code snippet, we’re here with you every step of the way.
Overview
Report Rover™ Support
Report Rover™ Dashboard Page Functionality
Welcome to the Report Rover™ dashboard page!
**For privacy purposes, company names have been withheld
- This page offers a quick look into your lead view page and website performance page
- In the top left corner, search for leads by company name, state, revenue, and more
- In the top right corner, click the person icon to view your user profile information
- If you are a verified user for multiple different websites, you can toggle between the website in the top right corner
- The dashboard page offers a preview of your top 5 warm leads, based on the highlighted criteria
- Toggle the dates to change the date range, and check the box to include ISPs like AT&T, Charter Communications, and more
- To see more leads, click “view all leads”
- Below is a snapshot of your website’s performance. Toggle the dates to compare time ranges
- To view more, click the graph icon on the left side of the screen
Report Rover™ Leadview Page Functionality
On the Report Rover™ Dashboard, you will find the Leadview page on the left-hand side of the screen.
**For privacy purposes, company names have been withheld
- This is where you will find a full list of your recent warm leads
- Search by company name, state, city, or page view in the top search bar
- Adjust your date range by choosing from one of our pre-set ranges or customize your range by clicking your desired start and end date
- To include ISPs, check the box to the side of the date range. ISPs will be identified with a red Asterisk mark. **This box will automatically start unchecked
- The lead view page showcases each company’s name, city, state, number of employees, revenue, sessions, and page views
- To view each company’s user journey through your website, click the map icon located in the middle of each column
- Click the magnified glass on the session ID you’re interested in
- This shows each page that the user visited throughout their time on your website. Whether it’s from the home page, to your work page, to your contact page, this information is vital to your sales and marketing team to be able to retarget, re-market, and reach out to turn your warm lead into a closed deal
- For more data, click the eye in the top right corner of the box
- This displays the referral source and medium in which the user traveled to your website, either through paid search, organic, direct, and same site. This information helps marketers evaluate their campaign performance, and understand where their website traffic is coming from in order to adjust their tactics and drive additional traffic
- Each page view is paired with a time stamp, so you know exactly what day and time the company viewed your website pages
- Be sure to view all your warm leads by traveling to each page listed
- Below the list of leads is a breakdown of industries, revenues, and employees
- This information is helpful determine what industry, revenue range, and size that your sales and marketing team should be targeting
- The world map below shows a heat map of where your website visitors are located. This information can be used for geo-targeting specific company locations
Report Rover™ Website Performance Page Functionality
On the Report Rover™ Dashboard, you will find the Website Performance page on the left-hand side of the screen.
**For privacy purposes, company names have been withheld
- This is where you will find a snapshot of how your website is performing
- Toggle the drop downs to compare different metrics on your website
- Adjust your date range by choosing from one of our pre-set ranges or customize your range by clicking your desired start and end date
- Below the graph is a snapshot of each performance metric. Adjust the date ranges to compare time periods and see how your website is performing
- The last portion breaks down your website by each page, including its view count, average visit duration, and more
- This information is useful to determine where most of your users are spending time on your site, and which pages are most important to your potential customers
- To view exactly which companies have visited a specific page, click the contact book in the middle of the row
- Scroll or search the companies that visited that page, including their view count, page visits, and duration to determine how HOT the lead may be
What is Report Rover™?
More than 40% of salespeople say prospecting is the most difficult part of the sales process. Report Rover™ makes this easy!
Report Rover™ is a holistic B2B website platform that reveals the name of companies visiting your website. Report Rover™ is essential for businesses in the B2B space because we reveal companies showing interest in your products or services, without any inquiry.
Adding the Report Rover™ Code Snippet to your Website
To start gathering metrics from your website’s visitors, you’ll need to add a code snippet to your site’s head. To find your snippet, visit your account and click ‘Setup Organization’. Copy the snippet and paste it as high up in the head element as you can.
If you haven’t added code snippets to your website before, this may be an intimidating task. Depending on where your website is hosted, the process to add code snippets to your site can vary. Click your CMS below for steps on how to add your Report Rover™ tracking code to your website.
WordPress
Adding the Report Rover™ tracking code to WordPress can be different for sites using different themes. We recommend using a plugin to handle this for you.
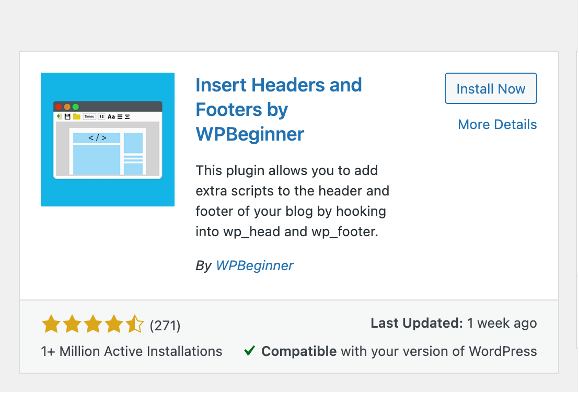
- In your WordPress admin, click ‘Add new’ under the ‘Plugins’ menu.
- Search “Insert Headers and Footers by WPBeginner”
- Click “Install Now” to install this plugin
- Activate the plugin
- In the left menu, click ‘Insert Headers and Footers’ under ‘Settings’
- Paste your code snippet in the ‘Scripts in Header’ field

- Hit save at the bottom of this page
- It’s installed! Go back to your Report Rover™ account and navigate to ‘Setup Organization’, where you grabbed your code snippet
- Click ‘Verify Installation’ to make sure that everything was installed properly
GoDaddy Website Builder
- When editing your website, in the left panel, click Settings.
- Click Head HTML.
- Paste your Report Rover™ code snippet in the Head HTML section
- Click Save.
- Go back to ‘Setup Organization’ in your Report Rover™ account and click Verify Installation to confirm that everything was installed properly
Wix
- Go to ‘Settings’ in your site’s dashboard
- Click the Custom Code tab in the Advanced section
- Click + Add Custom Code at the top right
- Paste in your Report Rover™ code snippet in the text box
- Enter a name for your code snippet
- Select All Pages under Add Code to Pages
- Choose to place the code in the Head under Place Code in:
- Click Apply
- Go back to ‘Setup Organization’ in your Report Rover™ account and click Verify Installation to confirm that everything was installed properly
Squarespace
- Log into the back-end of your SquareSpace website
- Navigate to Home Menu > Settings > Advanced > Code Injection
- Add your Report Rover™ code snippet to the Header field
- Click Save to save your changes
- Go back to ‘Setup Organization’ in your Report Rover™ account and click Verify Installation to confirm that everything was installed properly
Unlisted
Not seeing your CMS listed? If you’re unsure or uncomfortable adding your code snippet to your website, reach out to your website partner or web host to assist you.
How to Create UTM Parameters for your Ad Campaigns
Every digital ad that links back to your website should have tracking information associated with the link clicks so analytics software can measure their performance.
The tracking information can vary by platform, but it’s always a safe choice to use the standard that Google put in place to help measure your ad’s performance.
- Start by visiting Google’s Campaign URL builder linked below:
- https://ga-dev-tools.web.app/c…
- Fill out the required fields in the URL builder
- Website URL: Add the page URL that you want users to land on from your ad
- Campaign Source: google, facebook, linkedin, wherever your ad is being served
- Campaign Medium: cpc, banner, email
- Campaign Name: Add the name of your ad campaign
- Copy the generated campaign URL and add it into your ad. Users will now visit the site with all the UTM parameters added onto the URL.
- Report Rover™ can take those parameters and help you identify which companies came from which ads.
How to Add and Manage Users
- To manage users, or add additional users to your account, navigate to your account profile
- Click “manage users”
- To add a user, click “add accounts”
- If you don’t have enough users on your plan, you can upgrade your plan by visiting the Plans and Pricing page
- Add in the user’s information including their full name and company email address
- Click “send invite”
- This user will receive an invite to join your Report Rover™ account